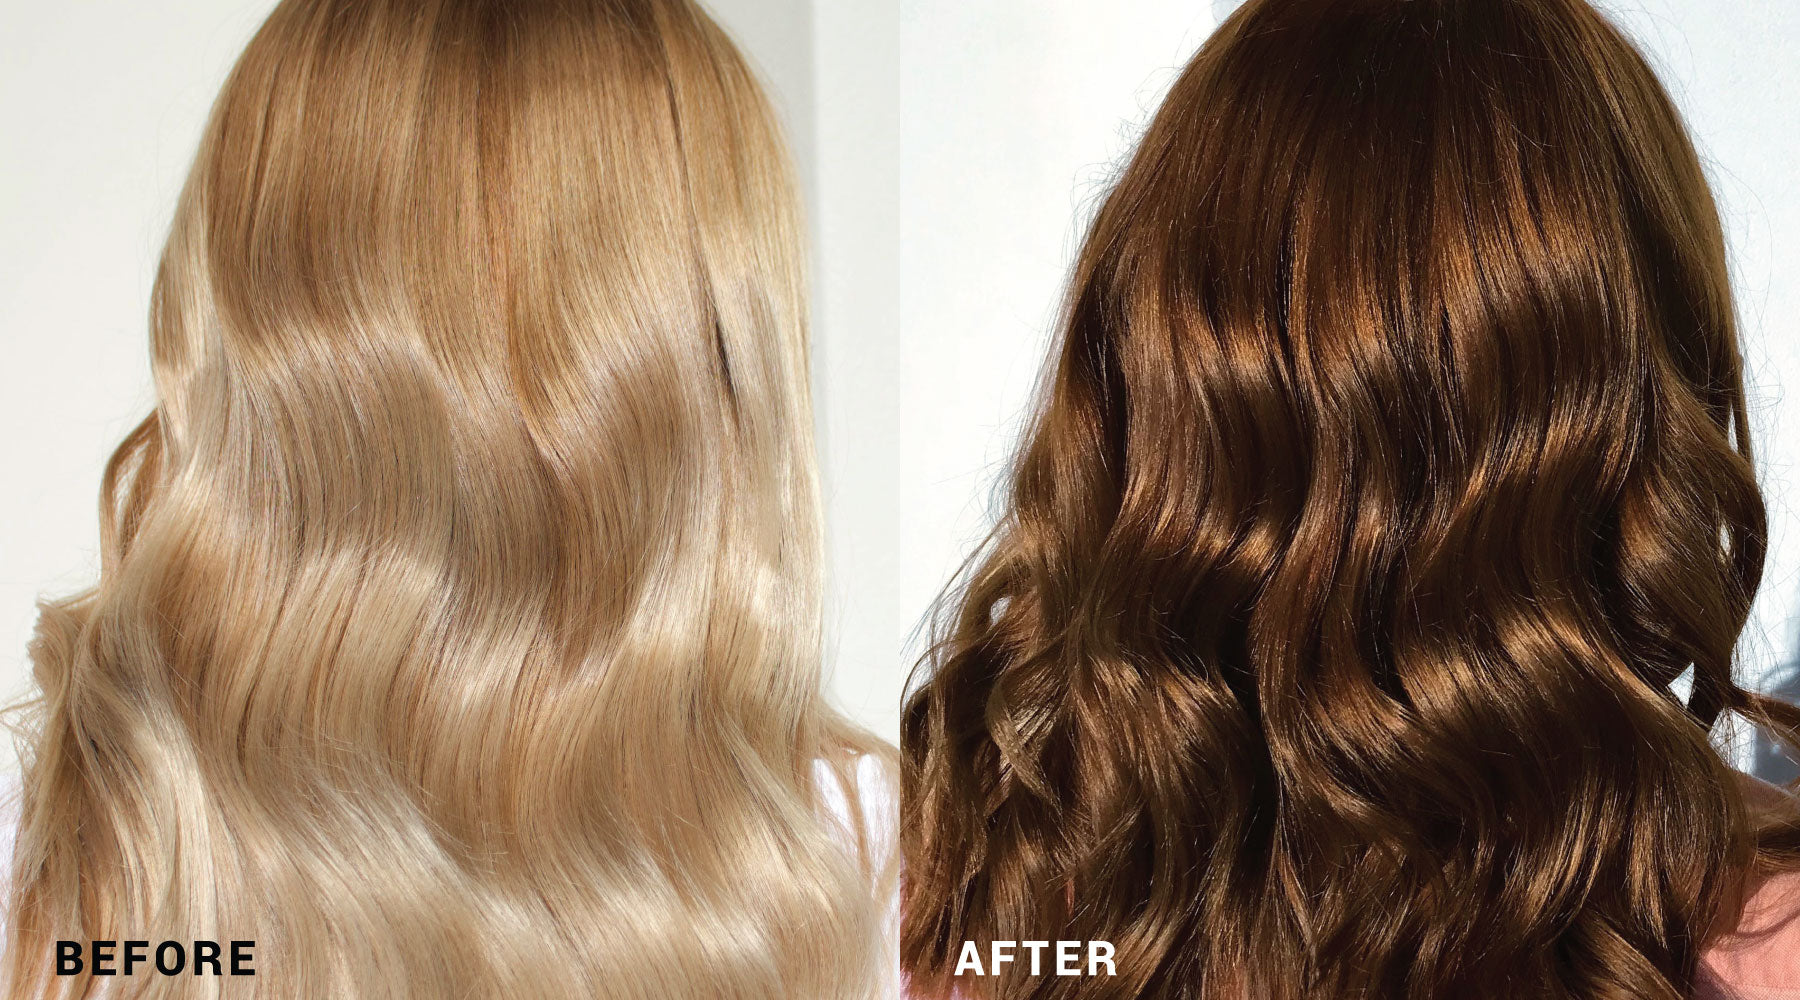
Coco Chanel once said, “A woman who cuts her Hair is about to change her life”. True Coco, but have you ever Coloured your Hair such a different Shade that when you walk past the mirror you don’t realise you’re looking at yourself? Thrilling.
So when that Colour change starts calling, it's worth reading about the nitty-gritty details now you're ready to pull the trigger. Whether you're ready to embrace a big Colour change or transitioning to a more Natural, low-maintenance Colour, you'll find everything you need in this Hair 101: How To Change From Blonde To Brunette guide.
Before You Start
How many Shades are you travelling down the Colour ladder? If you're making a big jump from Blonde to Brunette, there's a chance your Hair could end up Lighter, washed out with a green tinge. Essentially, if you’re Colouring your Blonde Hair with a Brunette Shade that's 3 or more Shades Darker, you'll need a Colour Filler.

What Is A Colour Filler?
When you’re Colouring your Hair 3 or more Shades Darker, a Colour Filler bridges the gap between your current and new shades by restoring pigment that may have been lost during lightening.
A Colour Filler is an intermediate Hair Colour applied before your Brunette Shade. It helps rebuild the pigment in your Hair and prevents the Lighter, washed out greenish or khaki tones. This step is essential for achieving a true, rich Brunette colour.
If your transition isn’t as drastic, you can skip this step and apply your new Shade directly. And one more thing—if your Hair is Naturally light, without any previous lightening treatments, a Colour Filler isn’t necessary for you either.
How To Know If You Need A Colour Filler
To determine if you need a Colour Filler, use our simple formula:
Your pre Lightened Colour number (find the Colour closest on the Natural Hair Colour Chart)
(minus)
Your goal Colour number
=
The number of Shades you need to Darken your Hair.
If the result is 3 or more Shades Darker, you’ll need a Colour Filler to achieve the best results and avoid any unwanted Tones.

How To Choose Your Colour Filler
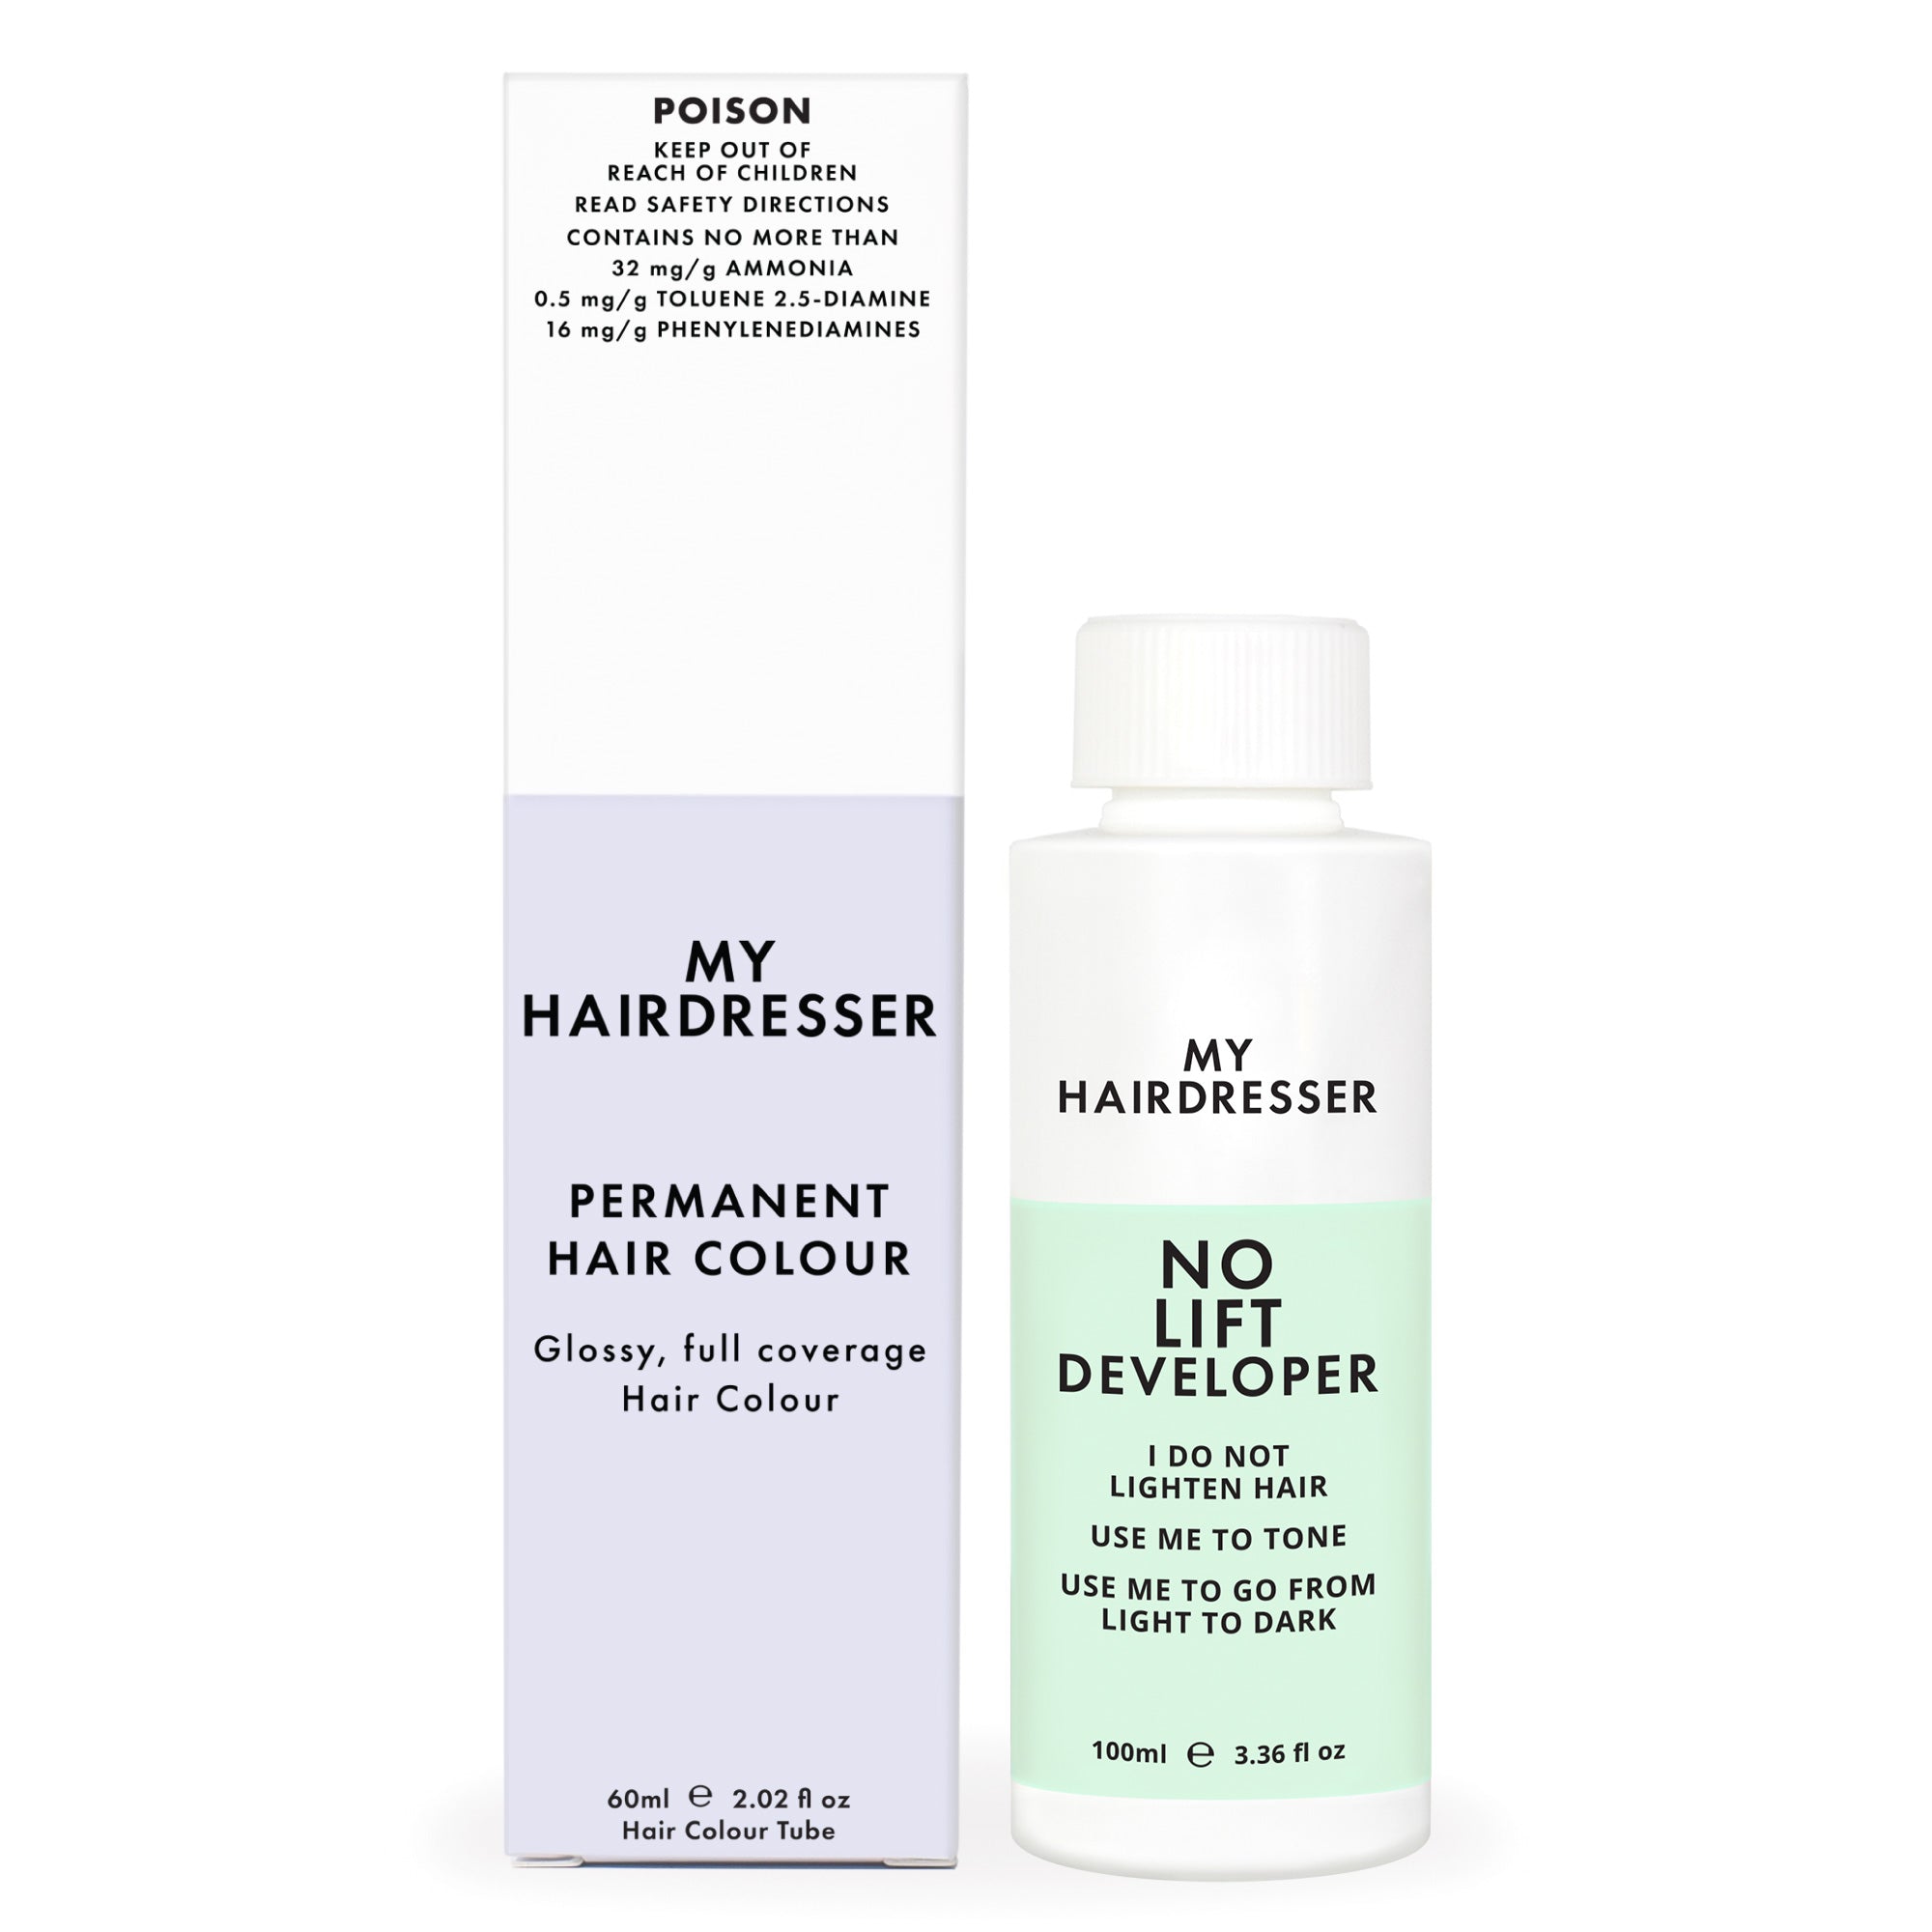
Because the Lightening process strips Warmth from your Hair, Warmth is exactly what we need to put back in with your Colour Filler. Choose a Golden or Chocolate Hair Colour that is 1-2 Shades Lighter than your goal Brunette and mix with a No Lift Developer. A Colour Filler needs to have a Warm pigment, regardless of the Brunette you want to be.
Choose one of these Hair Colours.


Mix your Hair Colour with No Lift Developer. Or try our Colour Filler bundle.
How To Apply Your Colour Filler
Mix your Colour Filler
Combine your filler Colour with a No Lift Developer in your Tint Bowl and Brush or Applicator Bottle.
Apply Your Colour Mixture

Apply your filler Colour mixture to your pre-lightened Hair, avoiding your Natural Regrowth.
Let your Colour process as you would with a regular Hair Colour.
Once the development time has been reached, rinse the Hair. Shampoo and condition as normal.

Now You're Ready To Apply Your Brunette
Brunettes are far more diverse than they're given credit for, offering a variety of hues to complement your skin tone.
For a pure Brown with an ultra-glossy, super-shiny finish, choose:


If you want a Cool crisp Brunettes with Cool Tones:


For a Brunette with a Golden, Bronzed look, go for:

Or have fun with Brunettes that feature amazing reflects:


For a Dark but not too intense Brunette, try these chic Darker Blonde options:


Applying Your Goal Hair Colour:
You can apply your goal Hair Colour on the same day over dry hair, or wait a day or two.
Use your goal Hair Colour with:
No Lift Developer: When your Natural Hair Colour is Lighter than your goal Hair Colour.

No Lift
Developer
20 Volume Developer: When your Natural Hair is 1-2 Shades Darker than your goal Hair Colour, or if you have Grey Hair.

20 Volume
Developer
Application Steps:
Step 1: Apply the Colour all over your Natural Regrowth.
Step 2: Apply the Colour over your Colour-filled ends.
Step 3: Let your Colour process as you would with a regular Hair Colour.
Step 4: Once the development time has been reached, rinse the Hair. Shampoo and condition as normal. Celebrate your new Hair!


